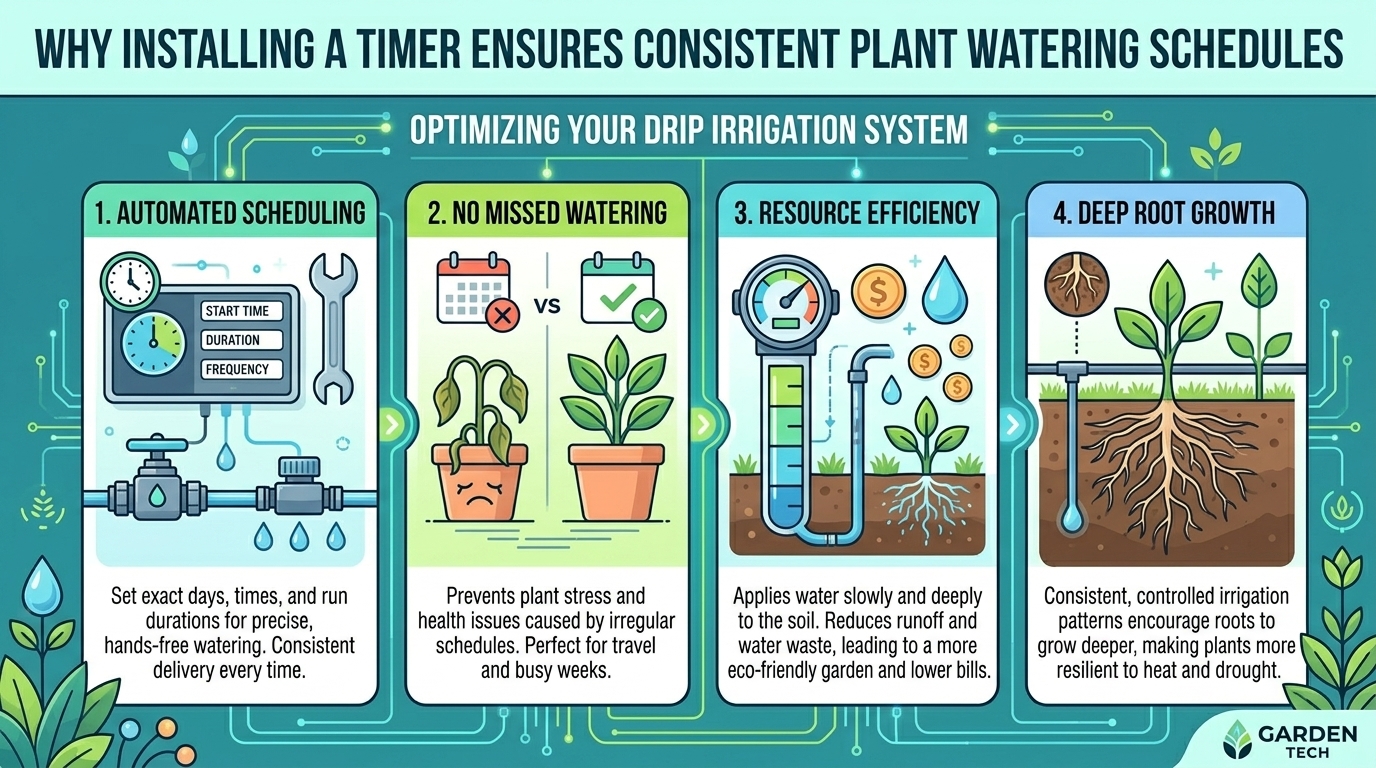
Why installing a timer on your drip irrigation system ensures consistent plant watering schedules? Hand-watering with a hose or relying on manual sprinkler valves often leads to inconsistent soil moisture levels, water waste, and avoidable plant stress. In modern landscape management, efficiency and precision are paramount. Pairing a low-volume drip irrigation system with an automated digital or smart timer transforms your garden’s hydration strategy from a daily chore into a precise, automated system.
By delivering controlled amounts of water directly to root zones on a fixed schedule, automated drip irrigation supports healthy root development, prevents fungal diseases, and drastically reduces municipal water consumption.
Whether managing heat-stressed beds across Texas, complying with strict urban water restrictions in California and San Francisco, navigating variable wet-dry cycles in Washington, or optimizing short summer growing seasons in New York, an automated drip timer provides the precise moisture management your landscape needs.
At KC Plants, we specialize in helping home gardeners design, automate, and optimize high-efficiency irrigation systems tailored to regional soil and climate conditions.
1. The Key Advantages of Automated Drip Irrigation
Consistency is the foundation of plant health. Irregular watering—alternating between prolonged drought stress and sudden over-saturation—shocks plant roots, causes fruit splitting in edible crops, and weakens a plant’s natural defenses against garden pests.
Core Benefits of Timer-Controlled Drip Systems
- Elimination of Human Error: Automated timers irrigate your landscape reliably on schedule, whether you are at work, traveling on vacation, or asleep.
- Optimized Water Absorption (Zero Runoff): Drip emitters release water slowly (typically 0.5 to 2.0 gallons per hour), allowing dense clay or sandy soils to absorb moisture deeply without surface runoff or soil erosion.
- Disease Prevention via Foliage Protection: Traditional overhead sprinklers wet plant leaves, creating ideal conditions for fungal diseases like powdery mildew, black spot, and leaf blight. Drip lines deliver water exclusively to the soil surface beneath the foliage.
- Targeted Hydration (Reduced Weed Growth): Applying water directly to target plant roots leaves surrounding unplanted soil dry, suppressing dormant weed seeds across garden beds.
| System Type | Water Efficiency Rate | Disease Risk Level | Labor / Time Required | Best Suited For |
| Manual Hose / Wand | 30% – 50% (High evaporation/runoff) | High (Wets leaves continuously) | High (Daily manual effort) | Potted porch plants, small nursery containers |
| Overhead Sprinklers | 50% – 60% (High wind drift loss) | Medium-High (Splashes soil spores) | Low-Medium (Manual or timed) | Open lawn turf, dense cover crops |
| Manual Drip Lines | 70% – 80% (Subject to forgotten valves) | Low (Keeps foliage dry) | Medium (Requires manual valve control) | Established shrub borders, veggie plots |
| Automated Timed Drip | 90% – 95% (Maximum precision) | Lowest (Targeted root zone delivery) | Zero (Set-and-forget automation) | All garden beds, trees, containers, raised beds |
2. Types of Irrigation Timers: Choosing the Right Controller
Selecting the correct timer hardware depends on your property size, water source accessibility, and desired level of control.
Single and Multi-Dial Hose Bib Timers
Battery-powered hose-end timers attach directly to outdoor spigots. They feature simple analog dials or digital screens to set watering frequency (every 6 hours to every 7 days) and duration (1 minute to 240 minutes). They are ideal for small gardens, patio containers, and isolated vegetable beds.
In-Line Valve Controllers (Multi-Zone Systems)
Hardwired or battery-operated multi-zone controllers connect to solenoid valves installed in valve boxes. These allow you to establish separate watering schedules (hydrozones) for different garden areas—such as high-water vegetable patches versus low-water succulent landscapes.
Smart Wi-Fi and Weather-Based Controllers
Modern smart controllers (such as Rachio or Rain Bird Smart systems) connect to local home Wi-Fi networks and pull real-time hyper-local weather data.
- Automatic Rain Delay: Automatically skips scheduled watering cycles when rain is detected or forecasted.
- Seasonal Adjustments: Automatically scales watering durations up during mid-summer heatwaves and down during cool autumn months.
- App Control: Allows remote overrides and manual zone tests directly from a smartphone.
3. Step-by-Step Installation Guide for Drip Irrigation Timers
Installing an automated timer onto a hose bib drip system requires a specific assembly sequence to protect your home plumbing and prevent line blowouts.
1.Attach a Vacuum Breaker (Backflow Preventer) to Spigot:Protects household drinking water supply.
Thread an anti-siphon vacuum breaker directly onto the hose bib thread. This safety valve prevents dirty garden soil water from siphoning backward into your home’s potable drinking supply during pressure drops.
2.Install the Digital or Smart Drip Timer:Mount control hardware securely.
Thread the top swivel inlet of your timer onto the vacuum breaker. Ensure rubber O-ring washers are seated properly inside couplings to prevent leaks. Hand-tighten firmly without over-torquing.
3.Add a Pressure Regulator and Filter Assembly:Protects low-pressure drip fittings from splitting.
Standard residential water pressure (40–80 PSI) will blow low-pressure drip fittings apart. Attach a 20 to 30 PSI pressure regulator below the timer, paired with a 150-mesh filter to trap mineral particles before they clog drip emitters.
4.Attach Tubing Adapter and Run Mainline Pipe:Connect system to distribution tubing.
Thread a 1/2-inch tubing adapter onto the bottom of the pressure assembly. Snap your main 1/2-inch poly drip tubing into the adapter compression fitting and extend the line into your garden beds.
5.Program Schedule, Flush Lines, and Install Emitters:Flush debris before inserting micro-emitters.
Program your timer settings (e.g., 5:00 AM start time for 30 minutes, every 2 days). Open the end cap of the main poly line to flush out plastic shavings, seal the end with a figure-8 closure, punch holes, and insert your root-zone drip emitters.
4. Regional Hydration Strategies Across Key States
Water needs vary dramatically based on geography, seasonal heat profiles, and municipal water laws.
- Texas (High Heat & Heavy Clay): Set timers for early morning runs (3:00 AM – 6:00 AM) to minimize evaporation. Clay soil requires “cycle and soak” programming—running 10 minutes, pausing 20 minutes for absorption, and running another 10 minutes—to prevent surface runoff.
- California & San Francisco (Drought & Water Mandates): Smart controllers are essential for complying with municipal watering day restrictions. Drip systems are often exempt from strict spray head bans in California, allowing you to maintain landscapes legally during drought declarations.
- Washington & Pacific Northwest (Seasonal Wet/Dry Transitions): Utilize rain delay features or smart weather integration. Turn timers off entirely during wet winter months, but program regular deep watering during dry summer months (July–September) when soil dries out quickly.
- New York & Northeast (Freeze Protection): Run timers during cool summer mornings to keep fungal spores down. In late autumn (October/November), completely remove battery timers from outdoor spigots, remove batteries, and blow out lines to prevent freeze expansion from cracking internal plastic timer valves.
10 Frequently Asked Questions (FAQ)
1. What is the best time of day to schedule drip irrigation?
The absolute best time to irrigate is early morning (between 4:00 AM and 7:00 AM). Soil is cool, winds are low, and water penetrates deep into root zones before midday heat causes evaporation losses.
2. How long should I run my drip system on a timer?
Run times depend on emitter flow rates (GPH) and soil type. Typically, a system using 1-GPH emitters in loamy soil requires 30 to 45 minutes per session (2 to 3 times per week) to deeply saturate root zones 8 to 12 inches deep.
3. Do battery-powered hose bib timers hold their schedule if batteries die?
Most modern digital timers feature non-volatile memory chips that retain your programmed schedule when batteries are replaced. However, the internal valve will fail closed, stopping all irrigation until fresh batteries (AA or 9V alkaline) are installed.
4. Why is a pressure regulator necessary when installing a drip timer?
Standard household water pressure ranges from 40 to 80 PSI, whereas drip emitters, drip tape, and micro-sprays operate safely at 15 to 30 PSI. Without a regulator, fittings can pop off, causing leaks and flooded yards.
5. Can I run multiple drip zones off a single hose bib timer?
Yes, using a multi-outlet timer (2-port or 4-port hose bib timer). Each port acts as an independent zone with its own solenoid valve, allowing you to program separate schedules for different garden beds.
6. Will a drip irrigation timer freeze and break during winter?
Yes. Water trapped inside plastic timer valves expands when frozen, cracking internal seals and housings. Always disconnect hose bib timers before the first hard autumn freeze and store them indoors.
7. How does a rain sensor or smart weather feature save money on water bills?
Rain sensors signal the timer to pause upcoming cycles when rainfall exceeds a set threshold (e.g., 1/8 inch), preventing unnecessary watering during storms and reducing monthly water bills.
8. How often should I replace the batteries in my outdoor irrigation timer?
Replace batteries once per year at the start of the spring growing season. Always use high-quality alkaline batteries rather than rechargeable batteries, which drop voltage quickly and can cause timer valve failures.
9. Why are my drip emitters clogging even though the timer is running?
Clogging is caused by fine sediment, mineral scale, or algae in your water supply. Ensure a 150-mesh or 200-mesh filter is installed between the timer and the drip line, and flush filter screens once per season.
10. Are drip irrigation timers compliant with municipal drought restrictions?
In most municipalities across California, Texas, and urban centers, drip irrigation systems equipped with automated controllers receive exemptions or higher allowances under drought rules compared to traditional overhead spray sprinklers.
Conclusion
Installing a timer on your drip irrigation system shifts your home garden management from reactive manual watering to precise, automated hydration. By establishing consistent watering schedules, protecting foliage from fungal dampness, preventing soil erosion, and customizing runtime settings for regional conditions across Texas, California, San Francisco, Washington, and New York, an automated drip timer ensures a resilient, low-maintenance landscape year-round.