Every serious home gardener—whether you are managing a raised bed in Austin, Texas, tending an urban balcony container garden in San Francisco or New York City, or cultivating plots in Washington state—knows the undeniable power of solid organic compost. Working compost into your soil builds long-term fertility, improves structure, and feeds the underground soil food web.
However, solid compost is a slow-release amendment. When your plants experience a sudden growth spurt, enter heavy fruit production, or show signs of nutrient stress, waiting weeks for solid compost to break down and release its nutrients can be too slow.
The ultimate insider secret used by professional organic horticulturists is liquid compost tea.
By brewing nutrient-rich organic worm castings in pure rainwater with an active oxygen injection, you can multiply billions of beneficial microorganisms and extract a liquid concentrate of bio-available plant nutrients. Spraying or watering your plants with this “liquid gold” provides an immediate, gentle boost that invigorates foliage and supercharges root zones.
This comprehensive, expert-backed guide walks you through the exact step-by-step process of brewing professional-grade, aerated liquid compost tea at home.
1. What Is Liquid Compost Tea and Why Is It So Powerful?
Liquid compost tea is not just muddy water mixed with dirt. True compost tea is a brewed, living microbial extract.
When you take finished vermicompost (worm castings)—which are already packed with humic acids, beneficial bacteria, and fungi—and suspend them in oxygenated water with a food source, something magical happens:
- Exponential Microbial Explosion: Within 24 hours, beneficial bacteria and fungi multiply from millions into billions.
- Nutrient Solubilization: The microbes break down solid organic compounds, converting locked-up minerals into fully water-soluble, bio-available ions that plant roots and leaves can absorb instantly.
- Foliar Protection: When sprayed directly onto plant leaves, these beneficial microbes form a living biological shield on the plant surface, outcompeting harmful pathogens and preventing fungal diseases like powdery mildew.
2. Why Use Rainwater and Worm Castings?
The quality of your compost tea depends entirely on the ingredients you start with.
A. Why Rainwater?
Municipal tap water in many regions (such as hard water areas in Texas and California or chlorinated urban water supplies in New York and San Francisco) often contains chemical disinfectants like chlorine and chloramines, along with dissolved salts. Chlorine and chloramines are designed to kill microorganisms—which means they will destroy the very beneficial bacteria you are trying to cultivate in your tea!
- Rainwater is naturally soft, free of chlorine and heavy mineral salts, and chemically neutral, providing the ultimate gentle solvent for microbial life. (If you cannot collect rainwater, let your tap water sit open in a bucket for 24 hours so the chlorine dissipates naturally).
B. Why Organic Worm Castings?
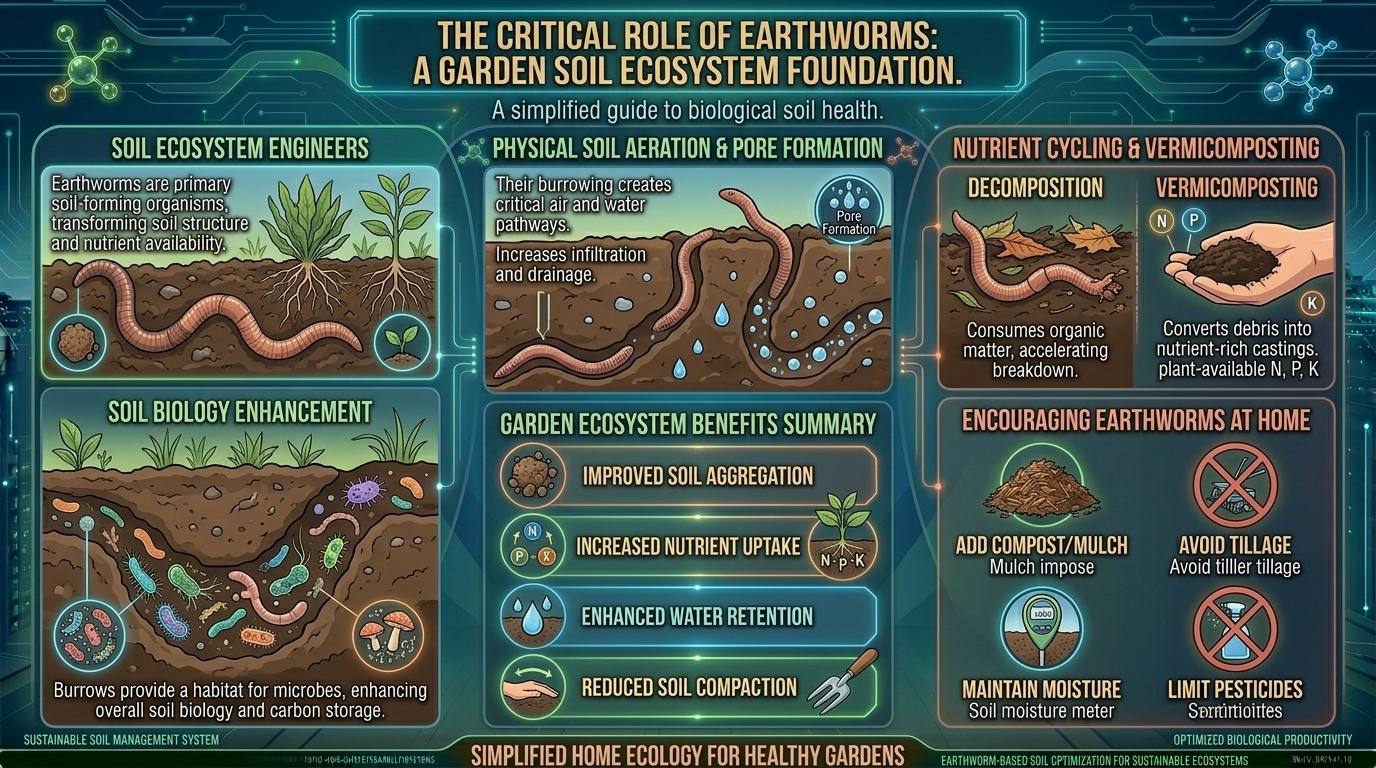
While outdoor yard compost is wonderful, worm castings (vermicompost) are the absolute gold standard for brewing tea. Castings are ultra-fine, free of weed seeds or woody debris, and loaded with concentrated microbial life and gentle, non-burning plant nutrients.
3. Equipment Needed to Brew Aerated Compost Tea (ACT)
To brew a proper, safe batch of compost tea, you need an aerated system. Un-aerated compost tea (often called “swamp tea”) lacks oxygen, allowing anaerobic, foul-smelling pathogens to multiply.
Equipment Checklist:
- A 5-Gallon Plastic Bucket: Clean and free of any chemical residues.
- An Aquarium Air Pump: A dual-outlet air pump with strong output capacity.
- Flexible Airline Tubing and Air Stones: At least two large circular or weighted air stones to sit at the bottom of the bucket.
- A Brewing Bag (Mesh Bag): A 400-micron or fine mesh bag to hold your worm castings.
- Optional Food Source (Microbial Catalyst): A small tablespoon of unsulfered blackstrap molasses, liquid kelp, or fish hydrolysate to feed the bacteria during the brew cycle.
4. Step-by-Step Brewing Instructions
Follow this foolproof protocol to brew a batch of 5 gallons of liquid compost tea in 24 hours.
Step 1: Prepare the Aeration System
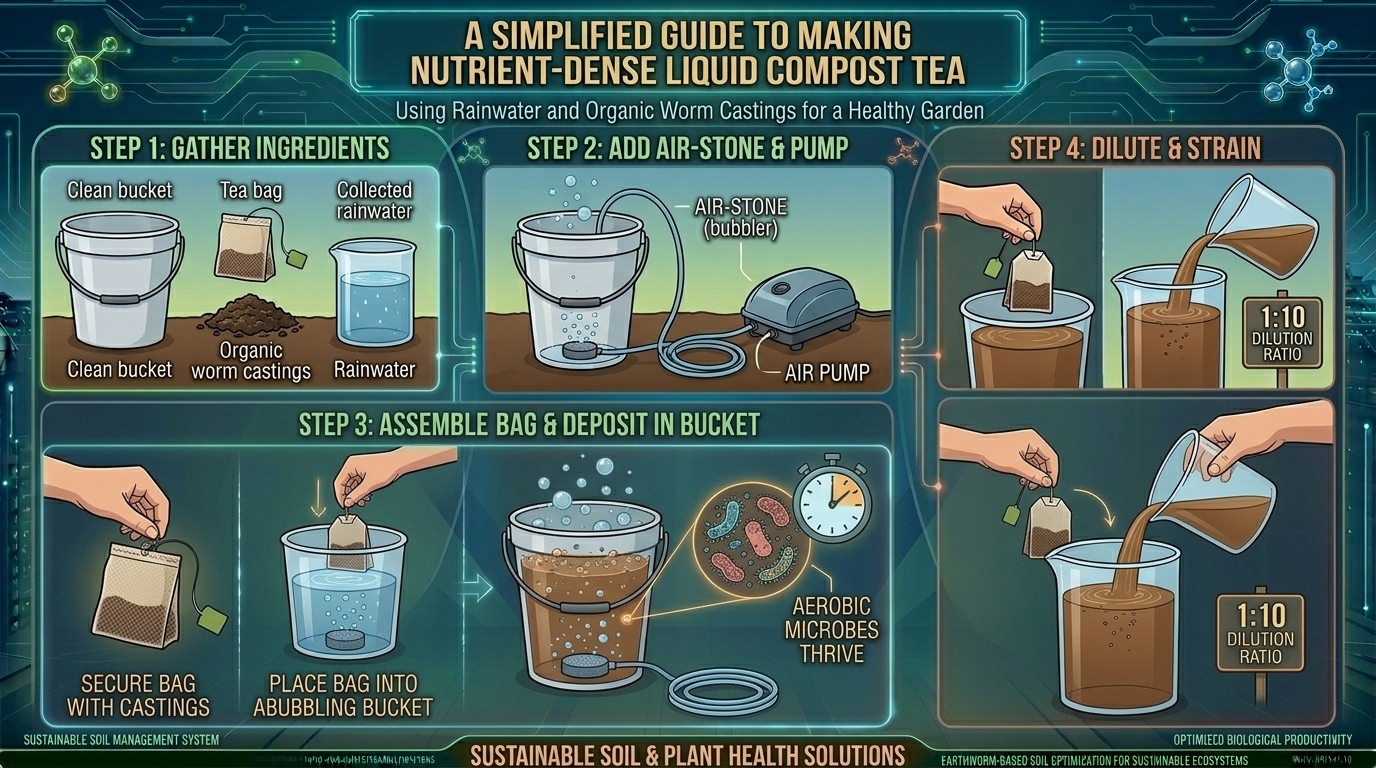
Place your 5-gallon bucket in a location with a nearby electrical outlet (garages, patios, or utility rooms work well). Connect your air stones to the airline tubing, attach them to the air pump, and drop the air stones to the absolute bottom of the bucket. Turn the pump on—you should see a vigorous, boiling froth of bubbles rising to the surface. Never skip aeration; oxygen is the lifeblood of your tea.
Step 2: Fill the Bucket with Rainwater
Fill the 5-gallon bucket with fresh, room-temperature rainwater, leaving about 3 inches of headroom at the top to prevent splashing.
Step 3: Add Your Microbial Food Source
Add 1 to 2 tablespoons of unsulfered blackstrap molasses or liquid kelp directly into the water. This provides a burst of simple sugars that kickstarts the microbial reproduction cycle. (Note: If you are brewing strictly for delicate seedlings or want a low-nutrient foliar spray, you can skip the molasses).
Step 4: Fill the Brew Bag with Worm Castings
Measure out 2 to 3 cups of high-grade organic worm castings. Place them inside your mesh brew bag and tie it securely. Submerge the bag directly into the center of the bubbling water. Massaging the bag gently helps dissolve the fine particles into suspension.
Step 5: Brew for 24 Hours
Let the system run continuously for 24 hours.
- What to look for: Within 12 hours, the water should turn a rich, opaque brown and develop a pleasant, earthy, yeasty aroma (like fresh-baked bread or rich forest soil).
- The Smell Test: If your tea smells foul, sulfurous, or sour like a swamp, your air pump failed, and it has gone anaerobic. Do not use anaerobic tea on your plants, as it can harbor harmful bacteria; dump it onto an outdoor compost pile and start over.
Step 6: Application
Turn off the pump, remove the bag of castings, and use your liquid compost tea immediately. Beneficial microbes begin to die off rapidly once oxygen aeration is removed. Put the tea into a watering can or a clean garden sprayer and apply it to your plants right away.
5. How to Apply Compost Tea for Maximum Results
- Soil Drench (Root Zone): Pour the tea generously around the base of your vegetables, herbs, and container plants. The microbes will colonize the rhizosphere, unlocking bound nutrients and protecting roots from disease.
- Foliar Spray (Leaves): Strain the tea through a fine cheesecloth so it doesn’t clog your spray nozzle, then mist it evenly over the top and bottom of plant leaves early in the morning. This coats the foliage in beneficial biology that blocks foliar fungal pathogens.
6. Frequently Asked Questions (FAQ)
1. How long does brewed compost tea stay fresh after turning off the pump?
You should use aerated compost tea within 4 to 6 hours of turning off the air pump. Without active aeration, oxygen levels plummet, beneficial aerobic bacteria die off, and harmful anaerobic bacteria take over.
2. Can I use tap water instead of rainwater if I don’t have a rain barrel?
Yes, but you must neutralize chlorine and chloramines first. Fill your bucket with tap water and run your air pump with the air stones for at least 2 to 4 hours before adding the worm castings and molasses; this allows chlorine gas to off-gas safely into the air.
3. Will compost tea burn my plants if I make it too strong?
No! Unlike synthetic chemical fertilizers or high-nitrogen liquid chemical concentrates that can chemically burn plant roots if overdosed, organic worm casting tea is biologically gentle. It will never burn your plants, even if applied at full strength.
4. How often should I apply compost tea to my home garden?
During the active growing season (spring and summer), applying a fresh batch of compost tea every 2 to 4 weeks provides an exceptional biological and nutritional boost to your garden beds and pots.
5. Can I use compost tea on indoor house plants?
Yes, but with caution! Because indoor pots lack outdoor wind and rain to dry leaves quickly, soil drenches are usually much better for indoor foliage than foliar sprays to prevent indoor humidity issues or fungus gnats.
6. What happens if I forget and let my tea brew for 48 hours instead of 24?
In warm indoor temperatures, brewing past 24 to 36 hours can exhaust the dissolved food supply (molasses), causing the microbial population to crash and the brew to turn anaerobic. Sticking strictly to a 24-hour window is safest.
7. Do I need to clean my air pump equipment after every brew?
Yes. Rinse your mesh brew bag, bucket, air stones, and tubing thoroughly with clean water after every batch to prevent biofilm and harmful bacterial buildup in the microscopic pores of the air stones.
8. Can I add seaweed extract or fish hydrolysate to my brew bag?
Yes! Adding a tablespoon of liquid fish hydrolysate or cold-processed liquid kelp to your water along with the worm castings provides an incredible array of amino acids and trace minerals that supercharge the microbial tea.
9. Is compost tea a substitute for solid compost?
Think of compost tea as a biological supplement, not a total replacement for solid organic matter. Compost tea populates the soil with active microbes, but solid compost and worm castings provide the physical structure and long-term organic carbon your soil needs.
10. Can I store leftover compost tea in a sealed jug in the fridge?
No. Sealing compost tea in a container cuts off oxygen immediately. Storing it will cause it to go rancid and anaerobic within hours. Always brew only as much as you plan to use on the same day.
Conclusion
Brewing your own nutrient-dense liquid compost tea using pure rainwater and organic worm castings is one of the most rewarding, cost-effective techniques in organic gardening. By harnessing active aeration to multiply beneficial microbes into the billions, you create a living liquid fertilizer that revitalizes soil, protects foliage, and supercharges plant growth without a single drop of synthetic chemicals.