How to Build a Sturdy Wooden Trellis for Climbing Green Bean and Pea Plants in Raised Beds
There are few sights in the home vegetable garden as deeply satisfying as a lush, vertical wall of emerald-green foliage bursting with delicate blossoms and heavy clusters of crisp, sweet green beans or tender English peas. For centuries, climbing legumes have been a staple of home horticulture, offering incredible harvests while taking up a remarkably small footprint on the ground.
However, anyone who has ever planted pole beans or trailing pea vines without proper structural support knows how quickly a garden can turn into a tangled, rotting disaster. Left to crawl across the soil, climbing legumes smother surrounding plants, invite damp-soil fungal pathogens, and make harvesting an agonizing chore.
For gardeners growing anywhere from the scorching heat of Texas to urban rooftops in New York, sunny suburban yards in California, the damp microclimates of Washington, or the foggy, breezy hills of San Francisco, the solution is simple: vertical architecture.
Building a custom, heavy-duty wooden trellis tailored specifically for your raised beds transforms a chaotic patch into an efficient, highly productive vertical farm. This comprehensive, ultra-informative guide covers everything you need to know to design, build, and anchor a professional-grade wooden trellis using natural organic methods and simple DIY tools.
Table of Contents
- Introduction to Vertical Gardening for Climbing Legumes
- Bush vs. Pole Varieties: Why Climbers Need Heavy Support
- Choosing the Right Rot-Resistant Wood for Your Trellis
- Essential Tools and Materials Checklist
- Step-by-Step Guide: Building an A-Frame or Vertical Panel Trellis
- Anchoring and Securing the Trellis Inside Raised Beds
- Regional Weather Considerations (TX, NY, CA, WA, SF)
- Training Your Bean and Pea Vines to Climb
- Pro Tips for Maximizing Legume Yields and Structural Longevity
- Frequently Asked Questions (10 FAQs)
- Conclusion
1. Introduction to Vertical Gardening for Climbing Legumes
Vertical gardening is the ultimate space-saving hack for modern growers. By training plants upward rather than outward, you dramatically increase your garden’s square-foot productivity.
Climbing green beans and peas are natural athletes; they possess specialized botanical structures—such as twining stems (in beans) and delicate tendrils (in peas)—that instinctively reach out, grip, and spiral around any vertical wire, twine, or wooden slat they encounter. However, as these vines mature, fill out with heavy pods, and catch the summer wind, they exert a surprising amount of torque. Flimsy bamboo stakes or plastic netting often buckle under the weight. Building a sturdy wooden trellis ensures your plants have a reliable anchor all season long.
2. Bush vs. Pole Varieties: Why Climbers Need Heavy Support
Before breaking out the lumber, it is crucial to understand the distinct growth habits of your legumes:
- Bush Varieties: Bush beans and bush snow peas grow as short, compact, self-supporting shrubs roughly 18 to 24 inches tall. They do not require a trellis.
- Pole and Climbing Varieties: Pole beans and indeterminate climbing peas (such as shelling peas and tall snap peas) will climb anywhere from 6 to 10 feet high. They produce continuous harvests over a prolonged season, but their massive volume of green weight requires a rigid, structurally sound frame to prevent catastrophic collapse.
3. Choosing the Right Rot-Resistant Wood for Your Trellis
Because your wooden trellis will sit outdoors in damp soil, rain, and intense sunlight, choosing the correct lumber is vital to prevent premature rotting and splintering.
- Cedar (Thuja plicata): The gold standard for outdoor garden carpentry. Cedar contains natural aromatic oils that make it highly resistant to rot, decay, and insect damage without requiring toxic chemical treatments. It ages gracefully to a silvery-gray patina.
- Redwood: Exceptional durability and weather resistance, lightweight, and naturally resistant to moisture rot, though often more expensive depending on your region.
- Untreated Douglas Fir or Pine: An affordable alternative, but because Douglas fir and pine rot within 1 to 2 seasons in moist soil, you must seal them with a natural, food-safe linseed oil or organic tung oil before installation. Avoid pressure-treated lumber containing chemical preservatives (like alkaline copper quat) if your edible bean and pea vines will touch the wood directly.
4. Essential Tools and Materials Checklist
Gathering your materials before you begin ensures a smooth, frustration-free building session.
Lumber Specifications (for a standard 4×4 raised bed):
- Four 2×2 cedar or redwood posts (cut to 6 or 7 feet in length).
- Six 1×2 cedar or redwood slats (cut to match the length of your raised bed, typically 4 feet).
- Galibrated stainless steel screws (rust-proof, 2-inch wood screws).
Tools Required:
- Power drill and driver bits
- Hand saw or miter saw (if cutting your own lumber)
- Measuring tape and pencil
- Sanding block (to smooth away sharp splinters)
- Natural garden jute twine or galvanized wire mesh (for the climbing web)
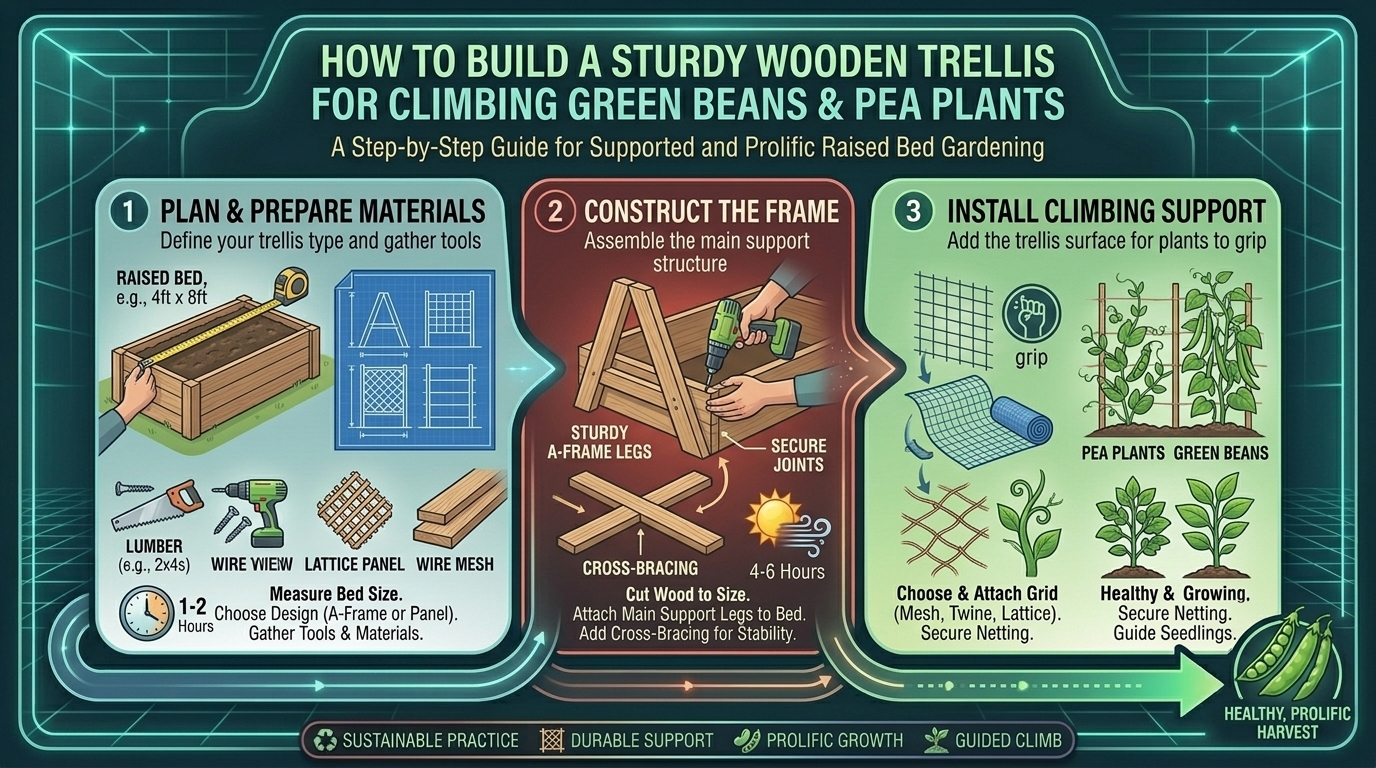
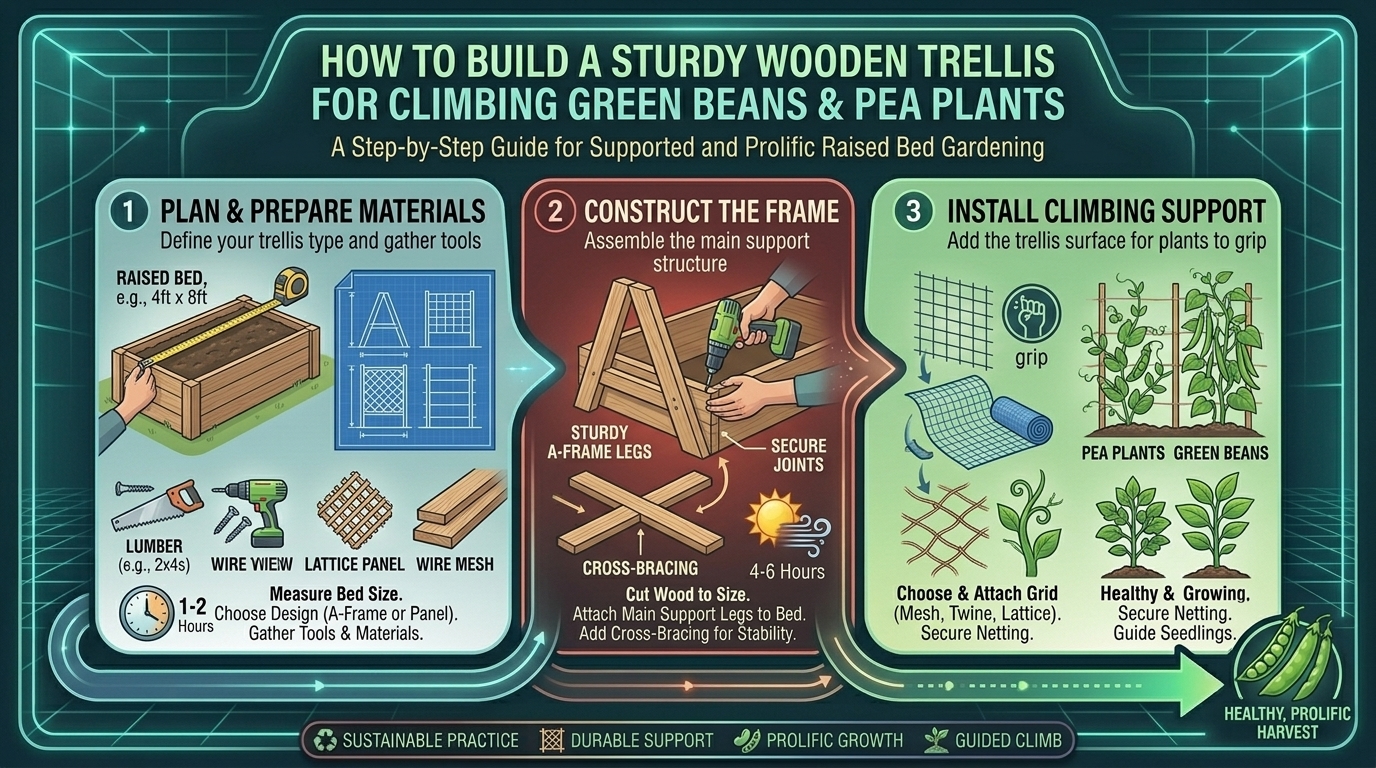
5. Step-by-Step Guide: Building an A-Frame or Vertical Panel Trellis
For standard rectangular raised beds, a Vertical Panel Trellis attached securely to the back frame is clean, stable, and incredibly efficient.
Step 1: Measure and Cut Your Lumber
- Measure the exact interior width and desired height of your raised bed. Cut your two main vertical posts to roughly 6.5 feet long so they stand tall above the soil line.
- Cut your horizontal crossbeams (1×2 slats) to match the width of your raised bed frame.
Step 2: Assemble the Outer Frame
- Lay your two vertical 2×2 posts flat on a flat workbench or patio.
- Position your top horizontal 1×2 slat flush with the top ends of the posts, and secure each side using two stainless steel wood screws.
- Measure down every 12 to 18 inches and attach additional horizontal slats down the length of the posts to form a sturdy ladder-like grid.
Step 3: Sand and Seal
- Thoroughly sand any rough edges or splintered corners to protect your hands while working in the garden. If using non-cedar wood, apply two coats of pure organic raw linseed oil and let it dry completely before installation.
6. Anchoring and Securing the Trellis Inside Raised Beds
A trellis is only as strong as its foundation. If not anchored correctly, a heavy wall of bean vines acting like a sail in the wind will pull the entire structure down.
- Direct Connection to Raised Bed Walls: Place the base of your vertical trellis posts firmly against the inner back wall of your wooden raised bed.
- Heavy-Duty Bolting: Drill pilot holes through the trellis posts and directly into the thick wooden frame of your raised bed. Secure them using 3-inch stainless steel bolts, washers, and nuts. Bolting the trellis straight into the structural bed frame creates an unbreakable bond.
- Adding a Trellis Netting or Twine Weave: If your wooden frame uses horizontal slats, you can weave natural jute twine vertically between the slats in a diamond or square grid pattern. This gives delicate pea tendrils and bean tendrils multiple intersecting surfaces to grab hold of.
7. Regional Weather Considerations (TX, NY, CA, WA, SF)
Your local climate dictates how your wooden trellis must be engineered to withstand environmental stress:
Texas (Beating High Winds and Intense UV)
- Strategy: Texas spring thunderstorms bring fierce gusty winds. Ensure your trellis posts are bolted deeply into heavy raised bed frames, and use thicker 2×3 lumber if necessary to prevent swaying and snapping under high wind loads.
New York (Handling Winter Freezes and Heavy Spring Rains)
- Strategy: New York’s freeze-thaw cycles can warp poorly seasoned lumber. Use genuine cedar, and consider unbolting and storing wooden panel inserts indoors during the freezing winter months to extend their lifespan.
California (Managing Dry Heat and Splitting Wood)
- Strategy: Dry California heat causes untreated wood to crack and splinter. Treat your wooden trellis with an organic linseed oil finish annually to lock in moisture and prevent structural splitting.
Washington (Defending Against Damp Rot)
- Strategy: Washington’s constant dampness accelerates wood decay. Keep the very bottom tips of your wooden posts elevated slightly above wet soil using metal brackets, or ensure heavy applications of rot-resistant cedar.
San Francisco (Conquering Coastal Fog and Moisture)
- Strategy: San Francisco’s coastal fog keeps outdoor structures perpetually damp. Select naturally rot-resistant redwood or cedar, and ensure your trellis is installed in the sunniest microclimate to allow the wood to dry out daily.
8. Training Your Bean and Pea Vines to Climb
Once your sturdy wooden trellis is locked in place and your seeds or seedlings are planted in rich organic soil beneath it, your plants will need a little guidance to get started.
- Gentle Guidance: Young pea and bean seedlings naturally search for something to grab. If a wandering vine starts straying across the soil or tangling with a neighboring plant, gently pick it up and wrap its tip loosely around the lower wooden slat or twine.
- Let Nature Take Over: Once a pole bean or climbing pea makes initial contact with a secure wooden slat or twine strand, its tendrils and twining stem will take over, spiraling upward autonomously week after week.
9. Pro Tips for Maximizing Legume Yields and Structural Longevity
- Build Before Planting: Always install your trellis before your plants germinate or before you transplant seedlings. Pounding stakes or screwing frames into a bed after plants are established risks crushing delicate root systems.
- Plant on Both Sides for Heavy Production: If you build a freestanding A-frame trellis, plant climbing legumes on both the windward and leeward sides. This balances the weight distribution and doubles your harvest yield.
- End-of-Season Cleanup: At the end of the autumn harvest, cut the dead bean and pea vines away at the soil line (leaving the nitrogen-rich roots to decompose in the soil), wipe down your wooden trellis, and check all screws for tightness.
10. Frequently Asked Questions (10 FAQs)
Q1: Can I use bamboo stakes instead of building a wooden trellis?
A: Bamboo stakes work fine for lightweight bush peas or single tomato plants, but they lack the structural rigidity required for heavy, sprawling pole bean vines loaded with hundreds of pods and caught in summer winds. A wooden trellis provides superior stability.
Q2: What is the best height for a raised bed bean trellis?
A: A height of 6 to 7 feet is ideal. This is tall enough to accommodate vigorous pole bean and tall pea varieties, yet short enough that you can easily reach the top tier of pods during harvest without needing a stepladder.
Q3: Will pressure-treated wood poison my edible bean and pea plants?
A: Modern pressure-treated lumber uses safer compounds than older arsenic-based treatments, but many organic gardeners still prefer to avoid chemically treated wood entirely when growing food crops. Cedar and redwood are naturally rot-resistant and completely chemical-free alternatives.
Q4: How do I attach netting or twine to a wooden trellis frame?
A: You can staple natural jute twine or heavy-duty polypropylene netting directly to your wooden frame using a heavy-duty staple gun, or drill small pilot holes through the wooden slats and thread the twine through in a crisscross grid pattern.
Q5: Do green beans and peas damage wooden trellises as they climb?
A: No. Beans and peas use light twining stems and soft tendrils to climb. Unlike aggressive woody vines like ivy, they do not secrete rootlets or bore into wood, meaning they cause zero structural damage to your wooden trellis.
Q6: Can I build an A-frame trellis inside a raised bed?
A: Yes! An A-frame trellis is fantastic because it is completely self-supporting. The two sides lean against each other at the top in a triangle shape, straddling the width of your raised bed and providing double the growing surface.
Q7: How do I prevent my wooden trellis from rotting in wet soil?
A: Avoid burying raw wooden posts deep in wet soil. Instead, mount your trellis posts to heavy-duty metal post brackets bolted directly to the inside walls of your raised bed, keeping the wood elevated above standing moisture.
Q8: What should I do with old bean vines at the end of the season?
A: Legumes are nitrogen-fixers that store atmospheric nitrogen in nodules on their roots. Cut the dead vines off at the soil line rather than pulling them out, leaving the roots in the soil to enrich your organic bed for the next crop.
Q9: Can I grow both peas and beans on the same trellis?
A: Usually no, because peas are cool-season crops that finish producing by early summer, right when warm-season pole beans are just starting to climb. They occupy the same structural space at different times of the year due to temperature preferences.
Q10: How do I repair a wooden trellis if a slat cracks mid-season?
A: If a wooden slat cracks under heavy fruit weight, you can easily repair it mid-season by screwing a short wooden reinforcement splint or metal mending plate across the crack using your power drill and short wood screws.
Conclusion
Building a sturdy wooden trellis for your climbing green beans and peas is a rewarding weekend carpentry project that pays dividends all growing season long. By selecting rot-resistant cedar or redwood, anchoring your frame securely to your raised bed, and creating a reliable vertical grid, you eliminate ground rot, maximize air circulation, and set your garden up for massive, effortless harvests.